by Chelsey Barnes
I bet you’re just dying to know how that Steampunk Circus costume turned out, aren’t you?
Well, I would have to say that, despite some minor setbacks, it was an outstanding success. Here’s how it went down (bear with me… I am not proud of how I photograph, and will share the goofy picture so it appears that I look dumb in pictures on purpose):
Let’s start with the stuff I didn’t make, shall we? First, there is the totally rad black and white striped button up shirt, found at a thrift store by a friend, and immediately snatched up by me because it was perfect. Then I found the black and white striped tights on clearance (I assume, since they are not on the website, and I don’t pay full price for anything) at my local neighborhood Hot Topic. But really, you can get striped tights just about anywhere; though, unless they are in a sealed package, I’d recommend staying away from any at a thrift store. Lastly, the shoes were another thrifted item, again found by a friend, and pretty much a staple of all of my steampunk costumes. A bit of advice: If you’re like me and lack the thrifting fu (or, perhaps, the thrifting patience), always go with a friend. Luckily, my friends have amazing thrifting fu.
Moving on, I’ll show you something I didn’t make, but did alter.
I truly have the world’s greatest daddy. I’m sure 30 years ago when my dad was–I kid you not–a chimney sweep, he wasn’t thinking, “Gee, I’d better hang onto this top hat because someday I’m going to have a daughter that’s into costuming,” but it’s sure come in handy. I cut a piece of my corset fabric as long as the circumference of the hat and about an inch shorter. It’s vinyl, so it doesn’t fray, so I didn’t hem the top and bottom. I did fold the sides in about 3/4″ in order to give stability behind the grommets. A few black grommets and a length of black satin ribbon, and the hat was all set. I would also like to thank genetics for having the same freakishly small head as my dad, because no one can steal my hat. *mwah ha ha ha ha ha ha*
Okay, so what kind of real sewing did I do? Plenty. And I managed to con a friend into helping, in order to keep my mental breakdown to a minimum.
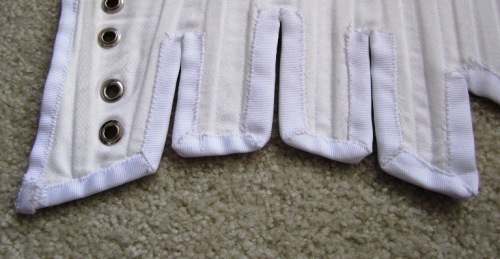
The corselet is the “tall” version of this Truly Victorian pattern. Honestly, it’s one of the easiest patterns I’ve ever used. Ever. I need to make like 900 more of these, because not only are the easy, they’re amazingly comfortable. The fabric is a custom order “Signature” vinyl from Jo-Ann Fabrics. It’s not on their website, sorry. It’s lined with muslin and duck cloth. The boning is the Wench Posse standard: cable ties.
The black sticking out is a petticoat roughly following these instructions at Sugardale. My dearest friend in the whole wide world (who kept working on this even after I accidentally stole her fortune cookie) did 99% of the work on this, gathering up and layering 4 yard, 6 yard, and 8 yard lengths of polyester lining fabric.
The skirt is a decadent 100% silk that I got for some ridiculous clearance price like $2.50/yd. Go ahead. I’ll give you a moment to curse me for snatching up super-cheap silk before you could. Better? Let’s move on. The skirt was not supposed to be that particular skirt. That skirt was born at the 11th hour. The, let’s say, 5th hour skirt was a red/black two-tone taffeta with black lace on top. Problem 1: It was way too heavy. It made this teapot (short and stout) look horrible. Problem 2: the layers were a pain to work with, mostly by my own fault. So I scrapped that, took my silk and cut two lengths selvedge to selvedge. I sewed those together up one set of selvedges and gathered them onto a waistband. An invisible zipper later, I was sewing up the other set of selvedges. I did a rolled hem on my serger to get myself out of actually hemming.
The next step is to work on accessories. Which is, admittedly, my weak spot. I certainly welcome suggestions, but I do know I will be including a pocket watch and little photos of ferrets.
…to be continued…


